Your Carfty Girl Header

. .
Showing posts with label Holiday. Show all posts

Tuesday, March 19, 2013

Easter Sign


Walked into Target and Easter was in the air. In the dollar section were these cute bunny ears which inspired this craft. You can look at Halloween Letter Craft for tutorial on how to make. Have fun crafting...


The Paper is from a all season stack from Hobby Lobby. I used Easter eggs, grass, ribbon and rhinestones to embellish the sign.


Of course the cute bunny ears have center billing on top of the O.


I found these cute little chicks at Micheals. I used a 1/4 yard of furry green fabric as the grass.

Image Map


Tuesday, March 12, 2013

Mint Oreo Brownies


Yummy green dessert for St. Patty's Day, but no matter when you make these they will be a hit. I always get rave reviews for these and after making them once. I get requests to make these over and over. My husband's Job always requests these, I'm starting to think they are making up potlucks to get these.

Let's get baking...


What you need:
Your Favorite Brownie Mix
Oreo Cookies


First. Mix Brownie mix according to box.


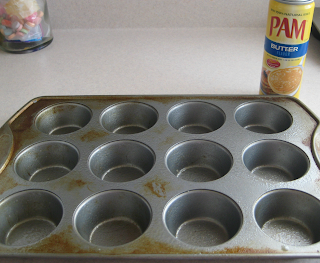
Second. Drop in Oreo cookies (I do about 3 at a time). Then coat Oreo with the brownie mix and pull out and drop in greased cupcake pan. 


 It may not seem like you have enough brownie mix but your good.


Third. Bake at 350 for 15 min. Take out of oven and allow to cool. I then use a knife to scrape along the rim for easy removal of Oreo brownies. Makes 2 dozen brownies.


I love to watch the surprise on peoples faces as they take a bite out of the brownie and find the wonderful Oreo surprise in the middle. Hope you enjoy this recipe. Let me know how you like them.


Image Map


Monday, February 11, 2013

14 Days of Love


So this year February has been so fun. I decided to do 14 Days of Love for my husband and kids. I went to the Dollar store and got some candy and wrote little notes on them. Every night I leave the treat on the table to surprise my family in the morning. They have loved it so much. I forgot to set out a treat the other night and my son woke me up and said "mom where's my love?"


Hope you have a great Valentine's Day.


Image Map


Thursday, February 7, 2013

Mason Jar / Heart Door Hanging


So when my sweetheart brings me home flowers one of my favorite things to do is to put them in my mason jar/ heart door hanger. They just welcome me home. Even when I don't have flowers or right now it's so cold outside here in Utah my fresh flowers would freeze. So I put in some fake flowers. Either way this is a great easy project. We did it for our Church Craft Day so for those of you who were not able to come, but wanted to know how to make it here is a step by step tutorial.

Note: In this tutorial I will also teach how to get that aged look by using Vaseline when painting the heart. You don't have to do that you can just paint the heart one color and skip to step five. Also, I will post another tutorial on how to make the bow so this post isn't so long.

Let's get started...

What you will need:

  • Wood heart (This one was cut out of wood thank you Tina Sillito, but you can find something similar at a craft store)
  • Quart Mason Jar
  • Wire Hanger
  • Paint (I used craft paint: American-Burnt Umber for the base coat and FolkArt-Jamaican Sea for the top coat)
  • Foam bush
  • Vaseline
  • Sandpaper
  • Ribbon


To Make:

First. Paint the heart. Like I said I will be showing you how to get the aged paint look. So first paint your base coat. I used American-Burnt Umber aka. brown.


Second. When the base coat is dry rub some Vaseline on your project with your fingers where you want the base coat to show through the top coat.


For this project I rub some on the sides and two spots on the front of the heart. Hopefully you can see where I put the Vaseline in the following picture.


Third. Paint on your top coat. I used FolkArt-Jamaican sea which is a pretty turquoise color.


Fourth. When the top coat is dry use your finger nail to scrape off the top coat where you applied Vaseline.


This is what it will look like after you scrape the paint off which is nice but we will take a step further...


Use some sandpaper to scrape up the top coat some more to give your project a beautiful aged looked. Generally you like to go along the edges, but there is no wrong way to do it cause the more you sand  the older and worn your project looks.


See how pretty it looks now.


Fifth. Now to attach the mason jar to the heart. Take the wire hanger and untwist it and use it to wrap around the mouth of your jar.


Sixth. On the heart there are four holes drilled. One set of holes are towards the edge of the heart and one set is lower and closer together. Feed the two ends of the wire hanger through the lower set of holes.


Seventh. On the back of the heart bend the wire up towards the other set of holes and feed the wire through them.


Eighth. Bend the wire up and twist it on itself to make a hoop to hang up your heart.


Ninth. Add a bow to the top of the wire. Like I said I will do another tutorial on how to make the bow. Then add flowers and hang and enjoy.


Hope you have fun with this project let me Know how goes and leave a comment.
  

Image Map


Friday, October 5, 2012

Halloween Letter Craft

Don't you just love it when you hit gold at the Target dollar section. Well that's what inspired this craft. I made a similar craft for Easter. Where I made the word HOP and the O has bunny ears (check it out at Easter Sign). So, when I walked into target and saw the bat headband. The creative juices began flowing. In the end I LOVE IT, I can put it on a table top but this year I hung it on my front door and I love it more.


Well what are you waiting for lets get crafting...

Supplies

  • Paper Mache letters ($1.99 @ all craft stores, I got mine @ Hobby Lobby 50% off)
  • Scrapbook paper (I scored this glittery paper @ $1 section @ Target in a pack)
  • Halloween headband ($1 section of Target)
  • Ribbon
  • Spider web
  • Embellishments (mine are from Target and Walmart.)
  • Paint
  • Mod Podge

To Make:

First. I cut the letters out of the scrapbook paper. Note when tracing the letter to cut, lay it on the right side of the paper. This will allow you to place the design where you like on the right side of the letter.


Second. Paint the edges of the letters. I went with black, orange and green.


Third. I glued on the spider web to the letters before I Mod Podge the scrapbook paper. Remember when working with spider wed a little goes along way and the more you stretch it out the better it looks. Then I added the paper.

Fourth. Have fun with your embellishments. The glitter skull on the B was from target in a pack of six. The Bats on the middle O are from the $1 section of Target in a pack. The glitter spiders on the last O are from Walmart they were confetti. And of course if you know me you know my obsession with ribbon I need help.
  

Like I said you can stand them up on a table top. This Year I wanted something new on my door so I hung them up with ribbon on my front door love it. I just duck tapped them to the top of my door. Sorry I didn't take a picture but you didn't see anything from the inside of the door.


Here is my Easter Version. Maybe this year I'll hang it up on my door.


Have fun crafting would love to see how yours come out.


Image Map